Navigating the world of Printed Circuit Board Assemblies (or PCBA for short) can feel pretty overwhelming, especially if you're just starting out. There are so many options and steps involved in electronics manufacturing that it’s easy to get lost. At Zhuhai Xinrunda Electronics Co., Ltd.—we’ve been around since 2004—we totally get how tricky things can seem for newbies. As a high-tech electronics firm, we’re all about offering top-notch manufacturing services like Surface Mount Technology (SMT), through-hole (PTH) assembly, Chip-On-Board (COB) techniques, and coating solutions. Our experience isn’t just about getting things done; it’s about helping you understand the ins and outs, so you can build better, faster, and with more confidence.

This guide's here to break down what PCBA is all about, so you can make smarter choices and really get your electronics projects off the ground—no stress, just clarity and support.
Understanding the Basics of Printed Circuit Boards and Their Components
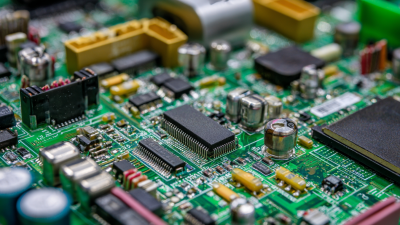
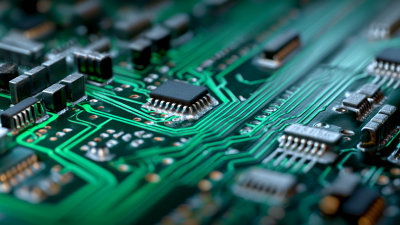
Printed circuit boards, or PCBs for short, are basically the backbone of most electronic devices. They’re what allow all the tiny components—like resistors, capacitors, and chips—to connect and talk to each other. If you’re just starting out, getting the hang of PCBs can feel a bit overwhelming at first. But honestly, it helps to start with the basics: understand the main parts like the substrate (that’s the board’s support), the copper traces (which act as the wiring), and the soldering techniques you'll use to put everything together. Knowing what each part does is super important, especially if you’re trying to troubleshoot problems or design your own circuits. It’s like learning the language of electronics!
Here at Zhuhai Xinrunda Electronics Co., Ltd., we've been around since 2004, and we’re pretty much experts when it comes to manufacturing high-quality electronics. We offer a range of services like surface mount technology (SMT), through-hole (PTH), and chip-on-board (COB) assembly—so we really cover all the bases. Our goal is to use our experience and tech know-how to help both newbies and seasoned pros. Whether you’re just getting started or looking to level up your designs, we want to make sure you’re equipped to create innovative, reliable electronic products that meet industry standards.

 Speaking of which, using automated testing equipment can be a real lifesaver for catching problems early on in production. Following a structured approach to testing not only boosts the reliability of your boards but can also save you a ton of time and money that would otherwise go into rework.
Efficient and Reliable Solutions: The Ultimate Guide to Automated PCB Assembly Services
In the ever-evolving landscape of industrial automation, the demand for efficient and reliable PCB assembly services has never been greater. At XINRUNDA, we understand that developing printed circuit board assemblies (PCBAs) for various systems—be it hard, soft, or integrated automation—requires a collaborative approach between designers and contract manufacturers. Our turnkey prototyping service is designed to foster this essential partnership, enabling you to take the lead in the manufacturing process while we provide the expertise and support necessary to bring your vision to life.
Our extensive capabilities in PCB fabrication and assembly ensure that we can meet the diverse needs of our clients, delivering dependable, high-quality boards tailored for any application. Whether it’s addressing urgent design changes or implementing innovative solutions, our agile manufacturing processes allow us to respond swiftly and efficiently. At XINRUNDA, we pride ourselves on our commitment to excellence, offering automated assembly services that are not only reliable but also adaptable, making us the ideal partner for your PCBA projects.

FAQS
: The basic components of PCBs include substrate materials for structural support, copper traces for electrical connections, and various electronic components such as resistors, capacitors, and integrated circuits.
Understanding PCB components enhances troubleshooting and design skills, which are crucial for anyone entering the electronics field.
The commonly used types of solder are lead-based solder and lead-free solder, with the latter gaining popularity due to environmental regulations.
The proper technique involves heating the solder with a soldering iron and allowing it to flow around the joint between the component lead and the PCB pad, while ensuring not to overheat to prevent damage.
Common mistakes include neglecting to review the schematic before assembly, improper soldering techniques, and failing to clean the PCB surface prior to assembly.
Beginners can minimize errors by thoroughly understanding the circuit design, practicing proper soldering skills, and maintaining an organized workspace with all necessary components at hand.
Useful tools for the soldering process include tweezers for handling small parts and flux to improve solder flow and adhesion.
After soldering, it's important to inspect for cold joints or bridges and perform testing to ensure the functionality of the assembled PCB.
Enhancing soldering skills requires practice, attention to detail, and familiarity with the proper use of soldering tools and techniques.
Conclusion
Getting into the world of Printed Circuit Board Assemblies (or PCBAs, if you wanna get technical) can be both pretty exciting and a bit intimidating, especially if you're just starting out. It’s really important to get a handle on what the main components are and how they work, but don’t forget, choosing the right tools and materials is just as critical. Honestly, taking things step-by-step—like designing your first PCB layout and practicing your soldering skills—can make a huge difference in how good your final product turns out.
Also, heads up: there are some common pitfalls to watch out for. Knowing what mistakes people often make and following best practices when it comes to testing and troubleshooting can save you a lot of headaches down the road. Companies like Zhuhai Xinrunda Electronics, which has been around since 2004, really stress the importance of professional-grade manufacturing services, covering everything from SMT to PTH assembly, definitely helping to ensure your PCBAs come out top-notch. If you follow a clear, step-by-step guide, I promise you’ll build your skills and confidence—pretty soon, you’ll be producing reliable, quality PCBAs without breaking a sweat.
Related Posts
-

Challenges of Sourcing the Best PCB Design and Assembly for Your Business Needs
-
Ultimate Guide to Mastering Pc Board Assembly Techniques
-

Mastering the Best Printed Circuit Board Assembly Process with Industry Production Standards
-
Innovative Solutions for Efficient Pcbas Manufacturing Techniques
-

7 Top Reasons to Choose Pcb Assembly Services for Your Next Project
-

Innovative Examples of Best Printed Circuit Board Assembly Techniques in Modern Manufacturing
